 Joanna James
As a skill that relies largely on one's ability to translate what's gauged through observation, drawing portraits can prove challenging for novices. Here are some practical tips on how to catch the likeness of a subject and create an accurate portrait through keen observation.
This is the first step in drawing a portrait of any individual regardless of the shape of the face as such elements can be altered later. Drawing an oval shape allows those who are not yet confident in creating an unbroken line to focus with the use of a light line. It is also important to think about the type of character you wish to add to the portrait as everyone's features are different and it is important to notice features such as thinness, thickness, length of the face and how full it may or may not be.
The eye-level can be determined with a faint line that goes across the fact and it is crucial not to use the darker edge of the pencil to determine the eye level. The construction lines should never be too visible as the details are what should stand out at the completion of the drawing. This is why a faint line is always best when deciding the eye level.
The main purpose of this division is to learn how to add construction lines and the right proportion. The act of sub-dividing the eye-level into five parts or sections horizontally so as the outline of the eye is sketched on the points that are created through the division of the line. One must ensure that the distance between these two points is symmetrical as one section being longer than the other can create a portrait that's out of proportion.
Next, it is necessary to determine the proportions of the face and head and the oval shape must be divided into two vertical parts to achieve this. The centreline should go right down the middle of your portrait and you may also want to measure the halfway point of the centreline.
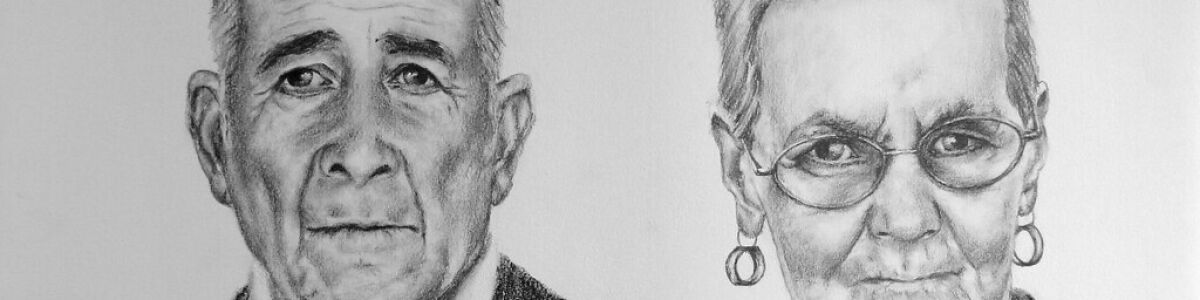
The next step is outlining the eye and it is important to make keen observations regarding the placement of the eye in your subject as well as the size of the eyes in proportion to their face. The shape of the eyes often determines the success or failure of a portrait as it is one of the most distinctive features of a human being. After the shape of the outline has been drawn, you can add illustrations to add texture and character to the eyes.
Now it is time to deal with the bottom half of the fact and it is easier to do so if one subdivides this section as well and repeat the motions as when drawing the top half of the face. First, add lines to indicate the placement of the nose and mouth and where the centre point between the nose and the chin are intended to be. Those who have seen portraits by Sri Lankan artists at venues such as the Sri Lankan Art Gallery will note that the distance between the nose and the mouth is a key feature that distinguishes one portrait from another.

A true believer that the pen is a mighty weapon, ventures into reaching the minds of every reader with the earnest hope of leaving an indelible stream of thought.
A travel writer who has a passion for fashion and a deep interest in admiring new and exotic attractions around the world.