mseangrant
We all use it. Many hate it. However, its not going anywhere especially if you work in a corporation or need to relay an idea visually. It's been said: "Power corrupts and PowerPoint corrupts absolutely". However, for those that use it well, it can be a compelling addition to a well told story or exciting product launch. What that in mind, here is a list of XX tips on effectively using PowerPoint.
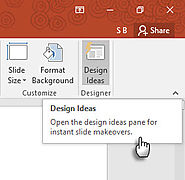
Suffering from “presentation block”? Advertisement With Microsoft PowerPoint 2016, you can banish both annoyances. Any presentation starts with the hunt for a suitable template or theme. Or creating a nice one from scratch. But you may not be a designer. Where to Find Free PowerPoint Themes & Templates Where to Find Free PowerPoint Themes & Templates A default template can be drab and lifeless. Fortunately, with plenty of free resources available, there is no need to settle. We have compiled some of the best PowerPoint themes & templates. Read More Drop the first image into a fresh slide and PowerPoint Designer automatically offers several design ideas. The recommendation engine works with 12,000+ creative designs created by graphic artists.Microsoft says:Designer applies cloud intelligence to analyze and identify the most compelling portion of your images to determine which blueprints work best with your content.You can also open it from . If you don’t find it useful, go to . Uncheck the box that says .The time-saving assistance isn’t only about dropping a pretty graphic on a slide. Designer uses cloud intelligence to analyze and highlight the most compelling portion of your images. Try it. It’s different from our old habit of selecting a pre-made template. – Right now, PowerPoint Designer recognizes a few simple slide types. As further updates arrive, the recommendations will get better with different slide types.
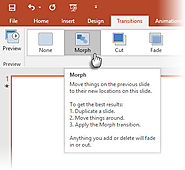
Found Motion Paths too difficult to apply?Morph Transitions in PowerPoint 2016 is designed to make animations easier. Simply explained, Morph allows you to move an object from Point A to Point B. To move objects effectively, you’ll need to have two slides with at least one object in common. An easy way is to duplicate the slide and then move the object on the second slide to a different place. You can also copy and paste the object from one slide and add it to the next.Then, with the second slide selected, go to .PowerPoint estimates the difference between the two slides and applies a smooth animation between them. Play around with movement and transitions. You can use Morph to move objects, change colors, shrink or zoom into a particular view.The Microsoft Mechanics video demonstrates Morph (and PowerPoint Designer):The direct transitions of Morph can be powerful tool to explain business processes or steps. Morph Transitions is an easier way to animate without the use of complicated motion paths. But unlike motion paths, the transition takes the shortest direct route.For example, you cannot show the curved flight path of a butterfly with a morph transition. For more complicated animations, revert to the use of motion paths. This feature is only available if you have an Office 365 subscription.
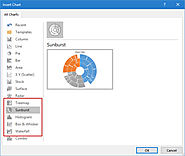
Stumped when you have to tell stories with data?Data visualization today is not only about displaying datasets. Effective visualizations send a message and help us recognize shapes and patterns. As we are wired to visualize information far faster than we can read it, using the right chart type in PowerPoint puts us at an advantage. 4 Data Visualization Tools For Captivating Data Journalism 4 Data Visualization Tools For Captivating Data Journalism Words and numbers are not enough. In the end, visuals will capture and convince your audience. Here are the tools that will help you turn your data into something great. Read More — Box and Whisker, Treemap, Sunburst, Histogram, (and within Histogram options, Pareto), and Waterfall – give the presenter more flexibility.This Microsoft Office blog article shows how to use the new Treemap and Sunburst charts to breakdown hierarchical data. — For a given set of numbers, Microsoft Office allows you to change the chart types. But ask yourself why is the chart important for the audience. If possible, simplify the data and look beyond charts.
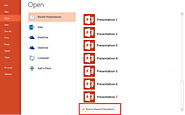
some day the unpleasantness of exiting a presentation, just to realize you did not saved it. Too late, of course. Well, actually not. With PowerPoint you can even recover unsaved presentations.Open PowerPoint again. Go to File and Open. You have on the right the list of all recent presentations. Just scroll down to the very bottom. And here you are, you should see a life-saviour button Recover Unsaved Presentations. Recent unsaved presentations can be brought back from the dead from here.
08/04/2016 Creating a video from a PowerPoint isn’t new – the ability has been built in since Office 2010. But it hasn’t always been an easy or elegant process, especially if you have multi-media content. Thankfully, there is an easier way, using a free Microsoft add-in called Office Mix. Office Mix gives you the ability to create and record interactive presentations and turn them into videos.Here’s how to create a video using PowerPoint with Office Mix:Step 1 to creating a Mix is to download it from https://mix.office.com/en-us/Home. After you’ve completed the installation process, you’ll get a “Mix” tab in your ribbon in PowerPoint:You can either use an existing presentation or start from scratch. Mix gives you some additional options for creating presentations like: PowerPoint actually has this capability already, but this will allow you to add pre-existing audio and video into the presentation you are turning into a video. You can record your screen directly from within Mix. This is especially useful if you’re using Mix to create product demos or how to videos. This is another feature that is much more useful than it sounds. Rather than having to take a screenshot in a separate program and inserting it into PowerPoint, Mix will let you take a screenshot of any window you already have open, which you can then edit using PowerPoint's image editing tools. These are built more for teachers, but if you have a quiz or poll you’d like to add to your presentation, you can do that using a few different add ins (available through Mix). A great place to use this would to be insert a quiz after an employee training video.After your presentation is created, it’s time to record it. Click the “Slide Recording” button to be taken to a new slide recording screen.You’ll get new options here, too, so you can record your presentation by slide. You can add voiceover or even add video of yourself with your webcam. You can also use the pen tool to mark up or write on your slides as you go.If you mess up, you can edit your recording by the slide, so you don’t have to start from scratch every time.You have a few different options for saving and sharing your videos: This option will guide you through a process of uploading your video to the Office Mix portal. From the portal, you can get a link to share your mix with others, change permissions, add closed captioning and more. The portal has an option to download the video, but if you’d rather just download a copy of your video directly, without uploading it at all, you can export your video as an MP4 (a few different size options are available). If you’re an Office 365 user, you can upload directly to your video portal. This portal will eventually be replaced by Stream, Microsoft’s newest video platform and this functionality will likely be ported over.That’s it! Video can be a great tool for small businesses. It’s just a matter of learning how to create them – this often seems like a huge barrier to entry for many small businesses. But if you can build a PowerPoint, using Mix, you can create a video.
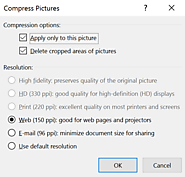
Hard drive capacities, cloud storage, and bandwidth keep increasing, but that doesn’t necessarily mean we can or should let our PowerPoint files increase in size unchecked.Text, vectors (such as .svg and emf content) and animation won’t add much to your file size—in fact, I’ve seen 100-slide decks without any images take up just a couple of megabytes—but photos and video can quickly balloon the size of your presentations if you don’t take care.ImagesYou can begin to control file size by choosing smaller images, to begin with before inserting them into PowerPoint. JPEGs will generally be smaller than PNGs (but always use PNGs for logos and detailed illustrations), and presentations designed to be printed or shown on extremely high definition screens will want higher res images. I won’t go into all the technical details of pixel size here but will say that the easiest thing to do to make sure your image has enough resolution is to place it in your presentation and project or print it and judge quality with your own eyes. Unfortunately, this will tell you if it’s big enough, but not if it is larger than it needs to be.And so, you may find yourself in a situation of wanting to reduce the size of your images after they have been placed in PowerPoint. The easiest solution is to select the image in question and then select “Compress Pictures” from the Format tab (or Picture Format tab on the Mac). Here you’ll find options for compressing the image at different levels of quality as well as checkboxes for deleting cropped areas of pictures and compressing ALL the images in the file or just the selected one.You’re free to make use of PowerPoint’s built-in compression tools, but be warned that they’re just not very good in my opinion. In the words of my friends at SlideRabbit, PowerPoint’s compression tools are more like a hatchet rather than a scalpel. The compression results in clunky sometimes over-pixelized images. And once you compress everything, there’s no going back, so be sure you have made a backup of your file first.NXPowerlite to the RescueIf Microsoft’s tools are a hatchet, then the scalpel you want comes from a company called Neuxpower in the form of NXPowerlite—hands down the best compression software for Microsoft Office that there is. NXPowerlite comes in a few different forms for Mac, PC, desktop, enterprise, etc. It is not expensive and entirely worth the investment if you spend your days creating presentations. How it works I have no idea, but I can say that I use it all the time and the results are magical. The interface is drag and drop, and it is all very well thought out. I’ve seen 100MB files filled with images compressed down to 5MB with no visible loss of image quality. I should note that while it is compressing images, it is also compressing the PowerPoint file itself, removing old and redundant code and other items. Do yourself a favor and pick up a copy here.VideoWhile you can insert YouTube videos onto slides (PC-only) or even just hyperlinks to nonYouTube videos, in general, I recommend embedding videos as you never know when internet access will be spotty or unavailable. None of the above tools will help with compressing video, and unless you want to compress your videos outside of PowerPoint (by re-encoding them using video software), your only solution is to head to PowerPoint’s “backstage” File tab: Info and select “Compress Media.” Here you’ll be given options for levels of compression. In my experience, PowerPoint’s video compression is a bit better than the image compression, but you’ll just have to experiment and judge the results for yourself.Final Tips and TricksEvery once in a while, compression will still fail to reduce file size enough for your needs. In these cases, you can actually unpack a PowerPoint file by changing the file extension to .zip, unzipping it and navigating to the media folder to search through all the image and video assets used by the file. If you discover a 20MB image somewhere, you can target just that one item.
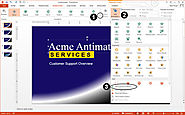
Let’s apply entrance effects to all three objects. Clickinside the company name (Acme Antimatter) and click the Animations tab on the ribbon. Apply animation in one of three ways,as you can see in the screen capture, below:Select an effect in the Animation section orclick the More button and select aneffectClick the AddAnimation drop-down and select an animationClick the AddAnimation drop-down, then click MoreEntrance Effects, then choose one from the dialog boxThree ways of applying animation to an objectNotice the small “1” in the box next to it. Now apply entranceeffects to the other two objects the same way. The slide should now show a “2”and a “3”, so it looks like this:Numbers attached to objects indicate the order of animationSince the yellow box text now comes in second, let’s changeit so it comes in first (the company name will then come in second).In Windows, click the Animation Pane button on the ribbon.That will display the pane on the right side, with the three objects listed.Object animation is listed in the Animation PaneEither drag the #2 item to the top, until you see a thinhorizontal bar at the top of the stack, OR select the #2 item and click the UpArrow on top of the stack.Re-order animation either by dragging list items in the Animation Pane or by using the Up and Down ArrowsOn the slide, the company name will now show a “2” box and theyellow box text will show a “1” box. Run the slide again, and that will be theorder they appear.The steps are similar on the Mac. Click the Reorder button, and that will displaythe floating Custom Animation box, also with the three objects listed.On the Mac, use the Reorder button to change the order of animationEither drag the #2 item to the top (there won’t be any thinbar to guide you), OR select the #2 item and click the Up Arrow below the stackof objects.Now it’s the same as in Windows: on the slide, the companyname will now show a “2” box, and the yellow box text will show a “1” box. Runthe slide again, and that will be the order they appear.When you apply additional animation to the same object, thetimeline will display the object more than once. An object will be listed oncefor each stage of animation.Let’s add an emphasis to the yellow box text. Click anywhereinside it, but if you’re using Windows, don’t just choose an animation from themain part of the ribbon, or you’ll remove the box’s original animation. We wantto add an effect to the existing one,so click the Add Animation drop-downand select an emphasis animation from the list, or choose More Emphasis Effectsand choose one from the drop-down.To add additional animations, click the Add Animation button and choose from the listIf you’re using a Mac, you do select an emphasis effect from the list. Unlike the Windowsversion, this will add an animation, and notoverride the previous one.Now use the same method to apply an exit effect.The result is that the yellow box text has indicators on theslide and in the timeline showing that it’s #1, 4 and 5 in the sequence.When an object has multiple animations, they're listed in the Animation PanePlay the presentation, and you see it comes in second, doesits emphasis, then exits before the company name and Customer Support text,since they don’t have any exit effects. So two adjustments to make:Make the emphasis last longerMake all three items exit togetherIn the Animation Pane in the Windows version, put the mousepointer on the end of the #4 bar so that the mouse pointer becomes a 2-headedarrow. Drag to the right, so the bar indicates that it’s now 2 or 3 seconds:Extend the duration of an animation by extending its bar on the timelineIf you’re using a Mac, the Animation Order box doesn’t havetiming bars. To increase the time of this effect, use the Duration box on the right side of the ribbon. (See screen capture,below.)Now click inside the Acme Antimatter text, then Shift-click inside the Customer SupportOverview text, so both text boxes become selected. The same way you did before,add the same exit effect that you chose for the yellow box text.If you run the presentation now, you’ll see that the yellowbox text still exits first. We want both #6 effects in the timeline to happenconcurrently with the #5 item. In Windows, either right-click it or click the drop-downarrow and select Start With Previous. You can also choose With Previous from the Start drop down on the ribbon.Making an animation start when the previous event startsIf you’re using a Mac, select both #6 items in the AnimationOrder box, click the Start drop-down,then select With Previous.On the Mac, you can choose With Previous from the Start drop-down on the ribbonNow when you run the presentation, all 3 items will exitsimultaneously.
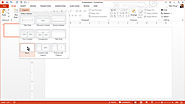
by Bob Flisser12 Mar 2014Difficulty:AdvancedLength:ShortLanguages:EnglishOfficeApp TrainingMicrosoft PowerPointThis post is part of a series called Presentation Fundamentals.How to Use and Edit PowerPoint Master SlidesHow to Add Videos to Your PowerPoint PresentationsThere's the default slide transitions in PowerPoint, but for the very best animations, you'll need to add custom animation to each object on your slide. There's the standard built-in object animations, like flying in or fading, but you might notrealize that you can apply motion paths, too. Motion paths are pre-made paths, likecurves and figure-eights, that your object will move along when its animation is played. The best part is that you can draw your own custom paths to make your objects do whatever you want in PowerPoint.Motion paths are available in any version of PowerPoint released in the last 10 years, although there are more built-in paths in the Windowsedition, and the paths are easiest to manipulate in PowerPoint 2013. But no matter which edition you're using, on your Mac or PC, here's how you can create and edit motion paths on your own. To follow along with this tutorial, create a new PowerPoint file, and from the Home tab, click the Layout button and choose a blanklayout. Using a blank page will be easier for these exercises. Now you're ready to start. Click the Layout button and choose the Blank layout from the drop-down listNow lets add an object to your blank slide so you can animate it. Again on the Hometab, choose a shape from the Drawingsection of the ribbon, or from the Shapedrop-down if you’re using a Mac.Draw a shape in the upper, left corner of the page.Formatting (or not) is up to you.Draw any shape on the page. You can also type text or insert a picture or video. Any object will work.Make sure the object is still selected, and go to the Animations tab. Now click the smalldown arrow on the right end of the animation samples.Click the small, downward-pointing arrow on the right end of the Animation sectionThen at the bottom of the panel that drops down, you’ll seethere are only six pre-made paths. Instead of choosing one of them, click theoption below for More Motion Paths.More Motion Paths is at the bottom of the drop-down. You may need to scroll down.That displays a dialog box containing many paths to choosefrom. Make sure the Preview checkbox is selected, and click a few paths to seethem run. Once you’ve chosen one you like, click OK. You can see it run againby clicking the Preview button in the upper, left corner of the PowerPointscreen.On the 2011 version of PowerPoint on the Mac, you displaythe paths by clicking the Motion Pathsbutton on the right side of the Animationstab on the ribbon. Choose one, and thepath gets applied, and the preview runs on the screen—though there's no preview in the selection chooser here.In the Mac edition of PowerPoint, click the Motion Paths button on the ribbonWhat if you change your mind and want a different pre-madepath?In Windows, selectthe path, then delete it (press the Deletekey on your keyboard). Now return to this dialog box and apply another one. Warning:if you don’t delete the path, PowerPoint will apply the new path and the old path, and they will run insequence.On the Mac, thereis no need to delete the path. When you go back to the Motion Paths dialog boxand apply a new one, the old one gets replaced.Now we're to the most important part: making your own custom motion paths. To draw a custom path, again click the small down arrow onthe right end of the animation samples. This time, select Custom Path.Draw a custom path by clicking the icon on the bottom of the Animation drop-down. You may need to scroll down.The mouse pointer will become a cross hair. Now, draw a pathon the page that you want the shape to follow. There are two ways to draw, andyou can combine techniques when drawing a path:Click and drag to draw a continuous scribble.Click-release, click-release, click-release todraw straight line segments.To end the drawing, double-click on the page.The beginning and ending of the line has a green and redtriangle, indicating the starting and ending points, and in the 2013 version,there are semi-transparent versions of the shape.You'll see the path on the screen. In the 2013 version, you'll see semi-transparent versions of the shape at the start and end pointDrawing motion paths on the Mac is almost the same as in the above steps on Windows. Click again on the MotionPaths button and choose either DrawFreeform or Draw Scribble. Themajor difference is that with the Scribble, you can’t draw more than onestraight line segment, and the shape gets completed automatically without yourhaving to double-click.AdvertisementOn both Windows and Mac, once you have a path—whether abuilt-in shape or a custom shape—you can modify it. For example, right-clickthe path and from the popup menu, choose ReversePath Direction, and the shape will travel in the reverse direction. The best part is that you can change the shape itself.Right-click the path and select EditPoints from the popup menu. Then you can drag the start and end points, dragthe control points to change the curvature (Bezier paths), and drag theadjustment handles to fine-tune the shape and smoothness of the control points.Adjust the shape of the path using the control points and the adjustment handles that come out of themClick the page background when you’re finished editing thepath to leave the motion path editing view—and if you want to start editing it again, just select the shape and select the Animations tab, and you'll be back in the editing view.PowerPoint has a lot of hidden features that allow you todraw and modify motion paths, and some of these features are similar to whatyou’ll find in high-end drawing programs like Adobe Illustrator. The key is toremember where the features are: they're all under the Animation tab in bothWindows and Mac. In Windows, you click the Down Arrow on the end of the list ofanimations, and on the Mac, you click the Motion Paths button on the ribbon.Ifyou drag the shapes and points around just a little bit, you’ll quickly get thefeel for how they work. Have fun making your own animations—there's a ton you can do with custom motion paths that'll take your presentations far beyond the basics.
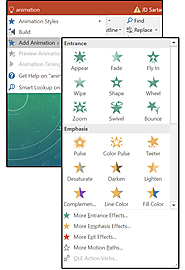
This new feature is a quick and easy way toget help on any feature or process. Just place your cursor beside the light bulb or click Tell Me What You Want to Do and type out your question. For example, type or and several related options appear in a drop-down list. Select an option and a submenu appears with features, additional options, instructions, or another submenu. In this case, the Animation submenu appears, displaying a variety of effects. Scroll through the list, or choose one of the More Effects submenus to see additional options. 03 Tell Me What You Want to Do
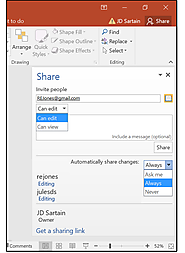
Now you can share and co-author projects thru the cloud. Click Share on the Ribbon menu to save your presentation on SharePoint, OneDrive, or OneDrive for Business. Next, the Share panel prompts you to invite people to share your projects. To access your Outlook address book, click the small book icon on the right side of the Invite People field. Once selected, click the permissions field below Invite People field to give your collaborators different levels of access to the document, and enter a message if desired. Finally, click Share.PowerPoint then sends an email to your colleagues, inviting them to view or edit the presentation. You can also attach a copy or a PDF of the presentation to the email. Note: Choose File > History to view a list of all changes and/or to view or access earlier versions. Also notice that when you export your presentation to video, you can choose the file resolution based on the output screen.
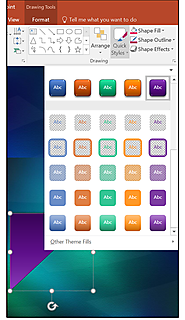
This feature is another way to help designers quickly create a slide presentation. Instead of always creating new styles for the shapes designers use in presentations (which takes time), PowerPoint has provided a number of “preset” styles that you can place with a single click. If more custom work is required, it takes far less effort to click through a color palette than it does to wade through all the effects. Draw a shape. While it’s still selected, click Quick Styles, then choose a preset from the menu. Whenever a shape is selected, the Format/Drawing Tools menus automatically display with the Drawing group open. 09 Quick Shape Formatting, new style presets
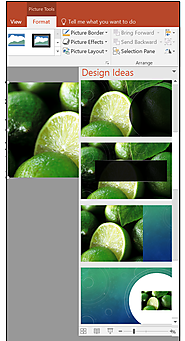
This new feature provides several “” for the layout of each slide in your presentation that contains graphic elements. Think of it as a your personal advisor who looks over your shoulder and provides ideas for better presentations. It’s automatic, too: As soon as you Insert an image, the Design Ideas panel opens on the right, offering several layout options for the design of the current slide.Select a layout, then continue adding more content to your slide. If none of the Design Ideas appeal to you, then close the panel and create your own layouts. 10 Design Ideas for presentation layouts