 c-dena
Exercises and activities for online and live classrooms
Preparation
Equipment: Interactive game visuals, timer, whiteboard, computer, projector.
Print this: Problem or activity with instructions for the students. Print this activity sheet to refer to during the activity.
Read this: Familiarise yourself with the instructions on this page.
Description
Think pair share is a problem-based learning activity suitable for higher education. This activity engages students and develops skills to apply critical thinking as an individual, participate in pair and group discussions. Lecturers will be able to observe student discussions that provide opportunities to gauge students’ grasp of the content.
Instructions
Based on carefully planned learning outcomes, the class is presented with a problem. Lecturers will need to communicate effectively to give clear instructions of the steps and what is expected of them.
The three steps of this activity are:
Success Boosters
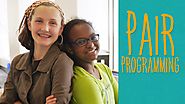
[Image from http://think-pair-share.co.uk/]
Featuring Fiona and Semira from Generation Code. Special thanks to Eckstein Middle School for use of the space.
Further links: https://blog.codinghorror.com/pair-programming-vs-code-reviews/
Problem: You want to involve all students in discussions, rather than having the same vocal students contribute.
Approach #1
1 - "what do you think is the most important aspect of this assessment - I'm open to comment but I'll ask someone random as well ..."
2 - Then let a vocal student student speak first, but not too long
3 - Then respond with "I think you've hit one nail but there are other key points as well. ( 3 second pause) What do you think .... aaahhh ... John?"
Approach #2:
1. State your question
2. Pause and look around room
3. Then direct it to a student.
The key strategy being that you don't say the name first, you give them that handing moment where they don't know if it is them. If you keep this process consistent, then they learn to think of the answer just in case.
Why do it?
Students often commence studies from high-school with a highly placed value on popularity, and preserving public image. This can be the antithesis of good behaviour, collegiality, and experimentation, and learning. A study into how audiences that exhibit such importance of extrinsic values can be primed to switch to be more intrinsically-motivated.
“We demonstrate that a simple process of asking people for whom extrinsic values are of particular significance to reflect on the importance that they attach to intrinsic values can lead to marked changes in the way that these people subsequently talk about bigger-than-self problems. For example, once their intrinsic values are engaged in this way, people who are normally more extrinsically-oriented are more likely to voice concerns about equality and justice, the moral imperative to address bigger-than-self problems, or to express a feeling of responsibility to others. Conversely, these people are less likely to invoke self-interest or financial concerns.”
The process involved asking participants to write about a paragraph or two (defined by space rather than words) in response to the following questions: “Why do you think acceptance is important”, “Why do you think affiliation is important?”, “Why do you think being broadminded is important?”. It is worth noting too, that the study found not only was the approach successful, but that you don’t need to prime intrinsic values specific to what you’re aiming for in order for it to be effective. Any communication that primes intrinsic values “is likely to increase this audience’s motivation to express concern about a range of social and environment issues” (ibid.).
A possible activity could be based on the global study of values common to 20 countries around the world, the following are possible exercise questions for students:
“Why do you think curiosity is important?”
“Why do you think creativity is important?”
“Why do you think a sense of belonging is important?”
“Why do you think a varied life is important?”
“Why do you think a being broadminded is important?”
“Why do you think being responsible is important?”
“Why do you think self-discipline is important?”
“Why do you think being healthy is important?”
“Why do you think being helpful is important?”
“Why do you think self respect is important?”
The purpose of Today I Learned/Exit Slips is to allow students to respond after learning. They are completed at the end of a class period and are collected by the teacher as students leave the room. Exit Slips provide quick feedback to the teacher about how students understood the lesson and/or what concepts might need further exploration in future lessons. Have students respond in writing using a stem such as the following:
• Today I learned …
• I don’t understand …
• I would like to learn more about …
• I need help with …
• A question I have is …
• Please explain more about …
• The most important thing I learned today is …
• Three things I learned today are …
• The thing that surprised me today was …
• I am still confused about …
• I wish …
• The best part of class today was …
As students leave the classroom, collect the slips. Use them to assess student learning and to plan follow-up instruction.
Source: http://www.baylor.edu/content/services/document.php/69290.doc &
Major, C.H., Harris, M.S., Zakrajsek, T. (2016) Teaching for Learning: 101 Intentionally Designed Educational Activities to put students on the path to success. New York: Routledge, p.303
To help get past writer's block, and understand argument:
Write a sentence claiming X.
Write a sentence refuting X.
Write a sentence reconciling X and not-X.
Write a sentence refuting the reconciliation.
Write a sentence claiming X.
source: http://www.publicseminar.org/2013/11/how-to-beat-writers-block/
What is it?
A way to facilitate quick and constrained feedback about issues with a design.
Why do it?
"TDC allows us to capture a list of tensions around the current design that the team can then tackle either tactically (incorporate improvements as we touch this design during subsequent updates), or strategically (schedule a bigger effort around a more serious redesign)."
How do you do it?
1. The facilitator presents the design on a big display, or prints it out and put it on the wall.
2. We go around the table, over and over again. During their turn, each person can share one (and only one) tension she or he has with the presented design, elaborating on the tension to the extent they deem necessary.
3. Tensions don’t have to be exclusive — you can repeat or add to another person’s prior tension.
4. Or you can skip (pass) your round if you can’t think of a tension at this moment.
5. Cross-talk (other people speaking out of their turn) is discouraged, unless it is used for clarification (“Wait, what did you mean by…?”).
6. The whole thing is capped at 20 minutes, or whenever we run out of things to say (everybody in the room skipped their round in sequence). The facilitator takes care of the order and keeps the meeting running smoothly.
Source: Marcin Wichary, Medium (https://medium.design/tactical-design-critique-bb74d1a5e350#.2zxlsr12a)
What is it?
An effective class format where students learn through a mix of lecture and peer discussion.
Why do it?
Lectures have been proven to be less effective in student learning. Peer instruction can improve understanding and engagement.
How to do it?
"Before each class, students are assigned reading in the textbook. Pretty standard for a lecture class, but if you talk to college students you'll find that many of them don't bother with the reading ahead of time. They come to class to figure out what information the professor thinks is important, then they go to the textbook to read up on what they didn't understand.
"In my approach I've inverted that," says Mazur.
He expects students to familiarize themselves with the information beforehand so that class time can be spent helping them understand what the information means.
To make sure his students are prepared, Mazur has set up a web-based monitoring system where everyone has to submit answers to questions about the reading prior to coming to class. The last question asks students to tell Mazur what confused them. He uses their answers to prepare a set of multiple-choice questions he uses during class.
Mazur begins class by giving a brief explanation of a concept he wants students to understand. Then he asks one of the multiple-choice questions. Students get a minute to think about the question on their own and then answer it using a mobile device that sends their answers to Mazur's laptop.
Next, he asks the students to turn to the person sitting next to them and talk about the question. The class typically erupts in a cacophony of voices, as it did that first time he told students to talk to each other because he couldn't figure out what else to do.
Once the students have discussed the question for a few minutes, Mazur instructs them to answer the question again."
How to do it?
"The lecturer lectures on a topic for 10-20 minutes.
The lecturer then displays a multiple-choice question on that topic.
Students are given up to a minute to think about their own answer, without conferring. Make sure students are given enough time to read the question and think about it, but don’t give them too long.
All students then vote on the answer. If flash cards are used, all the students should hold up their cards at the same time.
The lecturer then reports back the general distribution of answers to the class. For example, she might say “About half of you have voted for answer ‘A’, the rest of you are split between ‘C’ and ‘D'”.
If most students have the right answer, the lecturer confirms it and continues.
If most students have the wrong answer, the lecturer may go back, explain the topic again and then re-assess, either by asking the question again, or using another question.
If 40-80% of students have the right answer, students are given 1-2 minutes to discuss their answers with their neighbours. For example, the lecturer says something like “Now, turn to the person sitting next to you and try to convince them that your answer is correct. I’ll give you 2 minutes to talk about the answer and then we’ll vote again.” If you like, you can wander around the lecture theatre while this is happening and listen in on a few of the discussions.
After 1-2 minutes, bring the discussions to a close. The class then votes on the answer again and we go back to step 5.
If the proportion of students with the right answer has increased after the discussion, the lecturer can confirm it and move on to the next topic or question. If not, the lecturer might wish to explain the right answer before moving on."
Source: http://artsonline.monash.edu.au/peer-instruction-in-the-humanities/format-of-lectures/
"We encourage teachers to use student-centered teaching strategies that nurture students' literacy and critical thinking skills within a respectful classroom climate. The strategies suggested here can be used with students of all ages with any academic content. You'll find a complete list of teaching strategies on this page."
Source: https://www.facinghistory.org/resource-library/teaching-strategies
Microteaching is an approach in which students take turns developing short teaching modules and then teaching that material to the class.
Preparation
Organize the content into short, teachable chunks of information. Identify a sufficient number of short topics related to the content area that each student in your class may be assigned one. For example, if you have 30 students, you will need 30 short topics. These topics may be based on concepts and content such as key definitions, famous people, and short problems.
Determine how long each student may have to teach the rest of the class. These segments may be short, such as three to five minutes, or the segments may be as long as an entire class period for a relatively small and more experienced class.
Determine whether you will give students any guidelines; for example, they have to include a visual aid, or they have to be creative in their teaching approaches. Also consider providing them with an evaluation rubric so that they will know how they will be assessed.
Process
Pro-tips
Although in most situations, students will be given time to prepare their material, advanced students may be well pleased to have impromptu presentations. Such spur of the moment teaching modules can add an air of excitement to the classroom.
You can also have students work together in small groups to teach the class, which will take fewer topics. On the other hand, group presentations (in which one student talks as the remaining shuffle their feet) can be a difficult process to manage. If you decide to use groups, be specific that all students must be involved in the presentation and that their teaching approaches should not be straight lecture, one student at a time, but rather should be more creative.
While the Microteaching IDEA is effective with new students in brief segments, it is particularlt effective for more advanced students who may eventually want to teach themselves. Indeed, it is often used in teacher training as well as in formal professional development of graduate students.
Major, Claire Howell, Harris, Michael S., and Todd Zakrajsek (2016) "Microteaching", Teaching for Learning: 101 Intentionally Designing Educational Activities to Put Students On the Path to Success, New York: Routledge, pp: 112-114.
In Note-Taking Pairs,students work individually and then together in pairs to develop useful notes during a lecture.
Preparation
In advance of using Note-Taking Pairs, prepare a lecture with three to four identifiable chunks of information. The lecture should be structures into 10-15 minute segments, each focused on a different chunk of information. Finally, gather any supplies you anticipate needing. You may want to have paper an pencils at the ready, for example, in case students are not prepared to take notes.
Process
Pro-tips
This activity can lead to problems when students develop and pool together faulty information. Doing so can reinforce misunderstandings on the part of students. You will want to reemphasize key points, and you may also choose to review and assess students' notes for accuracy.
Some students are better notetakers than others, and those who are good notetakers may feel that they are doing more than their fair share of work in this activity. This may be particularly the case if they find themselves working in a group of other students who are not good notetakers. Consider changing group membership frequently and rewarding students for good note-taking, such as offering bonus points to a group's best notetaker. Alternately, find another way to illustrate that everyone is benefitting from the activity, for example, by sharing the benefits of teaching others to your own learning.
Many students today choose to take notes with laptops rather than paper and pencil. Providing them with the option of using their laptops can be useful (many students type faster than they write). When allowing students to use technology, agree beforehand that the technology will be used only for course-related work.
Major, Claire Howell, Harris, Michael S., and Todd Zakrajsek (2016) "Note-Taking Pairs", Teaching for Learning: 101 Intentionally Designing Educational Activities to Put Students On the Path to Success, New York: Routledge, pp: 97-99.
Pairs Check is a Reciprocal Peer Teaching activity that is particularly useful when students are working on mastery-oriented problems.
Preparation
First, you will need to develop a set of problems for student pairs to solve. The problems should be mastery oriented, and the process will likely be more effective with problems that have both a clearly correct and a clearly incorrect answer. Practice the problem set yourself to determine how long it will take to solve the problems. Depending on your skill level, it may well take students three to five times longer than it takes you to solve the problem independently. Having a "solution manual" ready for reference can be helpful. Problems that are worked out in sequential steps will be a handy reference for you to have and save valuable time if asked about a specific step on a problem.
Process
Pro-tips
Pairs Check can be a challenge if students are not familiar with a topic. Students who are new to a topic may not have a good idea about when a student is working accurately or not. This IDEA works better when students have a fairy good grasp on the kind of skills that they need to use in solving the problem. Novices leading novices can create some problems ad, unfortunately, solidify misinformation.
It may be helpful to develop a sheet defining the responsibilities of each partner when the first using this strategy with students. the sheet can provide examples of good coaching and praising skills, as well as the difference between coaching and providing the answer.
Our variation of pairs check is to have the students take turns within the given problem. The first person in the pair does step one with the second serving as a coach, and they then reverse roles for the second step, and so on. This approach is particularly effective if there are multiple complex steps in a process.
Major, Claire Howell, Harris, Michael S., and Todd Zakrajsek (2016) "Pairs Check", Teaching for Learning: 101 Intentionally Designing Educational Activities to Put Students On the Path to Success, New York: Routledge, pp: 99-101.
The Milling IDEA prompts students to respond to a set of questions about a give unit of content for items they know and to poll each other for information about questions that they cannot answer.
Preparation
In anticipation of using this IDEA, select an assignment for students to complete as homework, such as a reading or video letter. Next, create a list of related questions that students should be able to answer after having completed the assignment. The list should contain a mixture of easy, moderately difficult, and difficult questions. It may include definitions, multiple-choice questions, incomplete sentences, or short essays. Practice responding to the questions yourself to get a sense of the tie frame students will need to complete the Milling IDEA(they will need longer than you do to answer the questions).
Process
Pro-tips
This activity is an IDEA that can be used in any sized class but will work best in a medium-sized class. Very large classes may become a bit chaotic as students need space to move around, and very small classes may not have enough heterogeneity inability to answer a range of questions and a limited number f peers from whom to seek advice.
One variation is to stop periodically and ask what students are finding particularly challenging. You could then provide a quick tip or suggestion to get many of the students on the right track. Although using this variation too often would be disruptive, stopping once or twice might mitigate feelings or frustration.
Major, Claire Howell, Harris, Michael S., and Todd Zakrajsek (2016) "Milling", Teaching for Learning: 101 Intentionally Designing Educational Activities to Put Students On the Path to Success, New York: Routledge, pp: 101-103.
This movement, if planned well, can facilitate both learning and retention of new information. The Gallery Walk IDEA gets students physically moving around the room. Physical activity has been shown to improve attention to learning and interrupt lethargy, particularly when it interrupts long period (Jensen, 2005).
Preparation
In order to use the Gallery Walk IDEA, first develop a series of prompts and write one prompt each on large pieces of papers that will be put on the walls during the class period. This activity works best with open-ended questions or problems tat may be answered from several different perspectives. Sort texts, such as quotations, or images can also work well as prompts. Next, decide how long the activity will take and how much time groups will have at each station. Make decisions about how to display the prompts, such as using flip chart paper taped to walls of the classroom(gallery style), or you might use file folders with a sheet of paper and prompt inside, which are placed on desks or tables through the class. Create as many "stations" as you will have groups. Finally, secure the supplies you will need. In addition to the pads of paper to list the prompts, you will need tape and a variety of erase markers, which are less likely to bleed through the paper.
Process
Pro-tips
Variations in this IDEA include giving each person in the group a task as they move from prompt to prompt. For example, you might have students form groups of four and then number off. After they have numbered assign each number to a role (e.g., 1 = recorder for the group; 2 = make sure everyone in the group contributes something to the prompt; 3 = points out what looks to be the best contribution to that point and why; and 4 = timekeeper during the walk.
The Gallery Walk IDEA has great flexibility, as it can be a 15-minute activity or a week-long project that involves graded oral and written reports. Student time at each station could range from 1-5 minutes to work to 20-30 minutes or longer. Overall, this activity is a fun change of pace to a traditional lecture and discussion classroom. However, if used too often, it can begin to have a rote feel to it as well. Vary instructional approaches to keep it fresh, using Gallery Walk only a few times during a term and in different ways, such as to spark interest in a lesson you are about to start or to wrap up a unit of content.
Major, Claire Howell, Harris, Michael S., and Todd Zakrajsek (2016) "Gallery Walk", Teaching for Learning: 101 Intentionally Designing Educational Activities to Put Students On the Path to Success, New York: Routledge, pp: 103-105.
Anonymous Cards is an activity in which students write questions that are redistributed to peers, who then research and answer the questions that they have received.
Preparation
This IDEA requires little preparation. You simply need to determine how students will record their questions and how their responses will be distributed such that students do not know which question belongs to which student. The most basic option is to have students take out a piece of paper and write a question. Another option is to hand out index cards and have students use those, as they are easy to retrieve, shuffle, and redistribute. The only other preparation is to think through how to distribute responses. Students could pass all questions forward, and you could put them in a box, bowl, or other container; shake them; and pass them out. You might also have students write questions on papers, ball them up, and then throw them into the air on your signal. Student then pick up the paper that landed nearest to them. Again, there are many options; the key is that the system result in students not knowing who wrote which question.
Process
Pro-tips
While students are working on the responses, it is valuable for you to circulate to facilitate the process. Reinforce to the students that it is their responsibility to answer the questions but that you may serve as a resource to assist them by giving hints or pointing them in the correct direction if needed. It will be extremely important that you do not spend much time with any one individual or group in providing assistance. Not only would dallying make you less available to others, but t would also reinforce students asking you to answer the questions they are supposed to be answering. Consider assigning the research phase of the IDEA as homework and be prepared to take questions from students who may need assistance interpreting the question and finding the best way to answer it.
Just as some may be embarrassed to ask a question, some students will be nervous about providing their "answer" in front of their peers. The Think-Pair-Share and Speed Interviews sample IDEA pairings can help with this issue, as they provide opportunities for students to rehearse. Moreover, writing a response that they can help students cope with their anxieties.
All engaged learning has the risk of students getting frustrated because as the instructor you should be "providing information," not having them answer each other's questions. Consider explaining to the students that you are using this IDEA because answering questions is one of the best ways to learn material.
Major, Claire Howell, Harris, Michael S., and Todd Zakrajsek (2016) "Anonymous Cards", Teaching for Learning: 101 Intentionally Designing Educational Activities to Put Students On the Path to Success, New York: Routledge, pp: 105-108.
The Each One, Teach One IDEA addresses both of these areas in that students are responsible for teaching a small amount of course material and are presented the information from the level of the learner. Also, instead of listening to a lecture for information transfer, students are directly involved in both class preparation and delivery content.
Preparation
To prepare for Each One, Teach One, place a list of facts or concepts related to a single topic to be learned in a given class period on separate index cards. If there are more students in the class than concepts, it works well to have multiple cards with the same concept. Determine whether you will have all students comparing information with each other or if you will need to break students into smaller groups. The former works well in small classes, whereas the later works well with larger classes in which time will not permit each student to connect directly with every other student. Finally, you need to decide how much time to allocate to the activity. The amount of time it will take to complete this activity depends upon the complexity of the facts and concepts that you include.
Process
Pro-tips
Sufficient space is necessary for this activity to work well. Students need to be able to move around in the room so that they have contact with other students.
Alternately, choose a fewer number of facts to share, arrange students into smaller groups, and direct that the sharing be done among members of the group.
Let students "teach" the fact or concept they are assigned to teach. If you step in too much, or restate their work too often, students will stop putting in the work as they come to expect you to "reteach" everything. It is fine to correct errors and misconceptions but keep in mind that a different way of explaining something is not an incorrect way, and it my well not be necessary to explain it your way if the students have learned from the student presenters' perspectives.
This IDEA is a great way to get students talking to teach other and exchanging information. It can have a chaotic feel to it, however, which can be exciting but can also be overwhelming for students. Having so many different perspectives and levels of understanding presenting information can feel disorienting. It can also cause students anxiety if they are worried about that they will not get the answers they need to do well in the class. Debriefing to help them see the way the information fits together can be useful. A debriefing in which you provide them key ideas and issues can help to alleviate some of this anxiety.
Major, Claire Howell, Harris, Michael S., and Todd Zakrajsek (2016) "Each One, Teach One", Teaching for Learning: 101 Intentionally Designing Educational Activities to Put Students On the Path to Success, New York: Routledge, pp: 108-110.
The Jigsaw IDEA structures student learning in two set of groups to allow the students to discuss as part of a second group to learn content and then return to their primary group to discuss and teach it to others.
Preparation
Before implementing Jigsaw, develop a unit of content that can be broken into four discrete parts. Determine whether you will create resources and guides for students to use during the independent study phase of this activity or whether you will have them do research on their own. Additionally, decide whether you will leave it up to groups to determine how to teach their content or whether you will provide some parameters. There is some value to letting students be creative, but it can also be overwhelming, particularly for students who have not used the Jigsaw IDEA previously. Finally, identify how students will share their final product: quick report out, poster, online presentation, or some other method.
Process
Pro-tips
The Jigsaw IDEA is a well-researched (Johnson, Johnson, & Stanne, 2000) and often used activity that has been tried throughout the world (Kilic, 2008). Experiment with Jigsaw groups of different sizes from three to six. As the group size increase, timing is more challenging, but complexity also increases.
The Jigsaw can be a useful tool for managing challenging classroom dynamics. For example, when one student tends to dominate class discussions, Jigsaw takes away the person's leverage for doing that because the individual in question will not hold all of the information that needs to be shared. Likewise, if one student is not participating or if several are not participating asfully as they might, the Jigsaw creates space for them to have a specific job to do, and thus it gives them a way to participate and an opportunity for doing so; it makes social loafing much move difficult.
Major, Claire Howell, Harris, Michael S., and Todd Zakrajsek (2016) "Jigsaw", Teaching for Learning: 101 Intentionally Designing Educational Activities to Put Students On the Path to Success, New York: Routledge, pp: 110-112.
This activity can improve student research skills, organizational skills, and presentation skills. It also demonstrates to students the value of collaborations of individuals working on individual, yet related aspects of an intellectual challenge.
Preparation
The first step in preparing for Panel Presentation is to select topics (or alternatively have students select their own topics). Next, prepare an online of expectations for working and presenting as a collaborative including who will moderate the presentations (you or the students). You may provide them with a list of suggestions for their research, and you may wish to instruct them what to bring with them to class (for example, index cards with notes for their own presentations as well as a handout for the audience with a brief summary of their topic area with selected readings). It is also possible to assign panelists specific roles, such as for a particular position and against it, which can help to stimulate conversation. Roles may include setting timelines, peer review of material, and identifying in advance what will happen if a member of the panel does not delivery on promised material. Finally, decide how many groups you will have (four to six per group works best) and how long each will have (recommend a minimum of 10-15 minutes).
Process
Pro-tips
If students are new to higher education or to the field, you will likely want to be the moderator yourself so that you can help steer the conversation and avoid any problems. If they are more advanced students, student moderators can work well.
Panel Presentations work best when you allocate sufficient time to them. Under 10 minutes can feel like they are rushed, and it may not be sufficient time for conversations to occur. On the other hand, if they run too long, they can feel forced and like they are dragging out. Allow sufficient time, but keep the activity moving.
You may also want to prepare the audience by giving students specific roles. You may assign a critic, an encourager, a summarizer, and an extender, for example, or alternately roles of specific stakeholders with interests in the topic (if the panel is on higher education for example, you might assign students, faculty, administrators, policy makers, and so forth). This approach can help students understand the kinds of questions they can ask.
Major, Claire Howell, Harris, Michael S., and Todd Zakrajsek (2016) "Panel Presentation", Teaching for Learning: 101 Intentionally Designing Educational Activities to Put Students On the Path to Success, New York: Routledge, pp: 114-116.
Clustering IDEA involves having students transfer factual or conceptual information to each other while looking for connections and links between concepts and ideas.
Preparation
Develop a list of factual bits of information or conceptual statements around a single topic that can be grouped into different subcategories. Put each concept or statement on a separate index card. Shuffle the deck of cards so that linked ideas are not all grouped together.
Process
Pro-tips
This activity requires a generous amount of open space for students to engage in it fully. Do not use this IDEA if it will result in students tripping over fixed seating or if there are other physical limitations. It is a good approach to use in a smaller class that has moveable tables and chairs. If desks are not movable, students can work around a central table or a few desks and can consolidate their cards on the desk. If the weather is nice and there is space outside, this is an ideal activity to take outside the classroom.
Debriefing on the activity and talking about about the different clusters can help students solidify their understanding and can also help them see the value of the activity to their learning. This activity could also be done in rounds. After the first round, have the students repeat the activity, with the restriction that clusters formed in the second round have to be completed with the rule that no individual may be in a group with more than one person from round one. This approach will force students to form different clusters and look for similarities in those clusters.
Major, Claire Howell, Harris, Michael S., and Todd Zakrajsek (2016) "Clustering", Teaching for Learning: 101 Intentionally Designing Educational Activities to Put Students On the Path to Success, New York: Routledge, pp: 116-118.
The Speed Interviews IDEA engages students in short, information discussions around a specific question or topic.
Preparation
Identify key concepts or points in class where Speed Interviews will be used and plan to set aside approximately 10-15 minutes of time in class for each round of interviews. Identify the goal of the discussion, and then create a question or prompt for the group that will facilitate that goal. The goal will determine the prompt given and the amount of time allocated for the activity. Prepare a few follow-up questions to ask the groups when they report out to the entire class. Note: Keep in mind that not all groups must report out. For very large classes, it may be possible to call on only a few groups.
Process
Pro-tips
In large classes, there is often insufficient time to have every student report on their discussions. In addition, the overlap in interview findings can lead to students simply reporting their conclusions were the same as those already stated. To avoid this potential problem, call on a student to report and then ask for individuals to raise their hands if their Speed Interviews had similar conclusions.
One of the challenges in using this IDEA is haw to regain the attention of the class, particularly in large classes. You may choose simply turn off and on the lights or you may use an alarm on the classroom computer. Think through your approach before class in order to avoid having to yell over the groups to get their attention.
It is often helpful to capture the information discussion, although it may be possible to call on only a few students. One option is to have the students post a tweet of their root discussion. If these Tweets are posted, students could look for similarly to what other groups posted, and the discussion could be based on reactions of students to the tweets, which are summaries of the discussions.
Major, Claire Howell, Harris, Michael S., and Todd Zakrajsek (2016) " Speed Interviews", Teaching for Learning: 101 Intentionally Designing Educational Activities to Put Students On the Path to Success, New York: Routledge, pp: 118-120.
The Snowball IDEA (also at times designated in the literature as Pyramids) involves progressively adding students to groups at each iteration of the discussion cycle. This activity is ideal for providing a safe environment for students to speak who may be shy or have apprehension about speaking in class.
Preparation
After deciding to use the Snowball IDEA, identify a topic, problem, or set of questions that can be broken into smaller parts. Determine which part of the topic will be handled by which group size and how long each round will last. Finally, outline how you will describe both the structure and purpose of the Snowball activity.
Depending on the number of iterations desired, a Snowball discussion can take a significant amount of class time and may engage students for an entire class period. It is helpful to consider carefully the amount of time appropriate for the topic(s) to be discussed. Spending too much class time on lower-level discussions is not a good use of class time, which may well be noted by students. The activity should be structured so that students need to move fairly quickly to work through the assigned topic.
Process
Pro-tips
Students risk getting bored if the tasks do not change or are not challenging enough as the groups combine and grow larger.
Depending on the time allocated for each round of parings, students may feel rushed or not have time to complete the assignment. This potential challenge can be mitigated by carefully considering the time needed to complete the assignments given to each group and the succession of assignments to the progressively larger groups. Assignments that build upon one another will enable students to take the ideas from previous rounds and apply them to the current group assignment.
Monitor the conversations and activities occurring in the groups. These observations will help keep groups on tasks and identify points where groups struggle. Depending on the time available, you may wish adjust the time for each round(shorter or larger) depending on the groups' progress.
One option is to introduce information between rounds. For example, after dyads are formed, provide each dyad with a short newspaper article pertaining to the discussion topic. When the dyads then form groups of four, this new information may be considered.
Major, Claire Howell, Harris, Michael S., and Todd Zakrajsek (2016) "Snowball", Teaching for Learning: 101 Intentionally Designing Educational Activities to Put Students On the Path to Success, New York: Routledge, pp: 55-57.
In this IDEA, students examine an actual event, whether recent or from the distant past, and discuss how the outcome that surrounded the event might differ if one crucial condition were changed.
Preparation
In advance of using the What If IDEA, you will need to select a suitable course-related event. Next, identify one variable to change or have students discuss which variable to change themselves. Finally, determine the level of formality of the discussion and how long students will have to think about the event prior to engaging in the discussion.
Process
Pro-tips
This IDEA can be challenging for some students, particularly those who are most comfortable with learning the"facts" and proving that they have learned them by way of performance on objective tests. Other students will relish the opportunity to engage in learning in a different way. If a class has more of the former group, consider making the discussion less formal. If a class has the letter, you may want to ensure that some structures are in place to ensure that the discussion includes analysis rather than shifting too far out into speculation..
Consider how variables will be changed and then in what ways students might share with one another. For example, in a class of 30 students, you may have three different scenarios, each changed in one or two different ways. When used in this fashion, five students might be assigned each of the scenario/variable combinations. This approach allows for several topics to be discussed in class and also allow for some overlap to demonstrate to students that, even with the same scenario/ variable combinations, responses will differ.
Major, Claire Howell, Harris, Michael S., and Todd Zakrajsek (2016) "What If", Teaching for Learning: 101 Intentionally Designing Educational Activities to Put Students On the Path to Success, New York: Routledge, pp: 57-59.
In a Scored Discussion, the inner circle discuss the topic while the outer group scores the discussion by assigning "points" for persuasive arguments or ideas drawn from the readings.
Preparation
First, identify a set of questions or topics for the inner circle to discuss. Construct a brief scorecard for use by the outer circle. This card may include a few notes as to what 'scores" points during the discussion. Prepare a list of talking points for the conclusion of the exercise. This preparation will be helpful for ensuring that major issues not raised during the Scored Discussion activity are at least addressed. A traditional classroom arrangement in rows hinders participation in discussion. The attention in the room is focused on the front of the room and the instructor, as that is where the chairs are all oriented. Students have a difficult time engaging with one another as a result of the classroom setting. Arranging seats into circles with students facing each other leads to improved participation (Steinzor, 1950).
Process
Pro-tips
This activity is most effective when students remain engaged. Variations can allow for students to change roles. Some instructors use set times to alternate roles; others prefer to let outer circle students tap inner circle students on the shoulder to switch places.
Students in the outer ring can become bored if their task and role is not sufficiently challenging. In addition to switching roles to maintain engagement, ensure that the outer group has defined tasks and roles to follow. This might include not only giving points but also looking for themes and content as well as examining the inner group dynamic. Monitor the outer group too.
One additional adaptation is for you to serve as the "bull's eye" for the activity. You sit in the very center of the circles and engage the inner circle in a dialogue while the outer circle scores the questions and responses of those in the inner circle.
Scored Discussion works best with sufficient space and moveable seating. Arranging chairs into concentric circles with sufficient space will help the dynamic and allow easier movement between the two circles.
Major, Claire Howell, Harris, Michael S., and Todd Zakrajsek (2016) "Scored Discussion", Teaching for Learning: 101 Intentionally Designing Educational Activities to Put Students On the Path to Success, New York: Routledge, pp: 59-61.